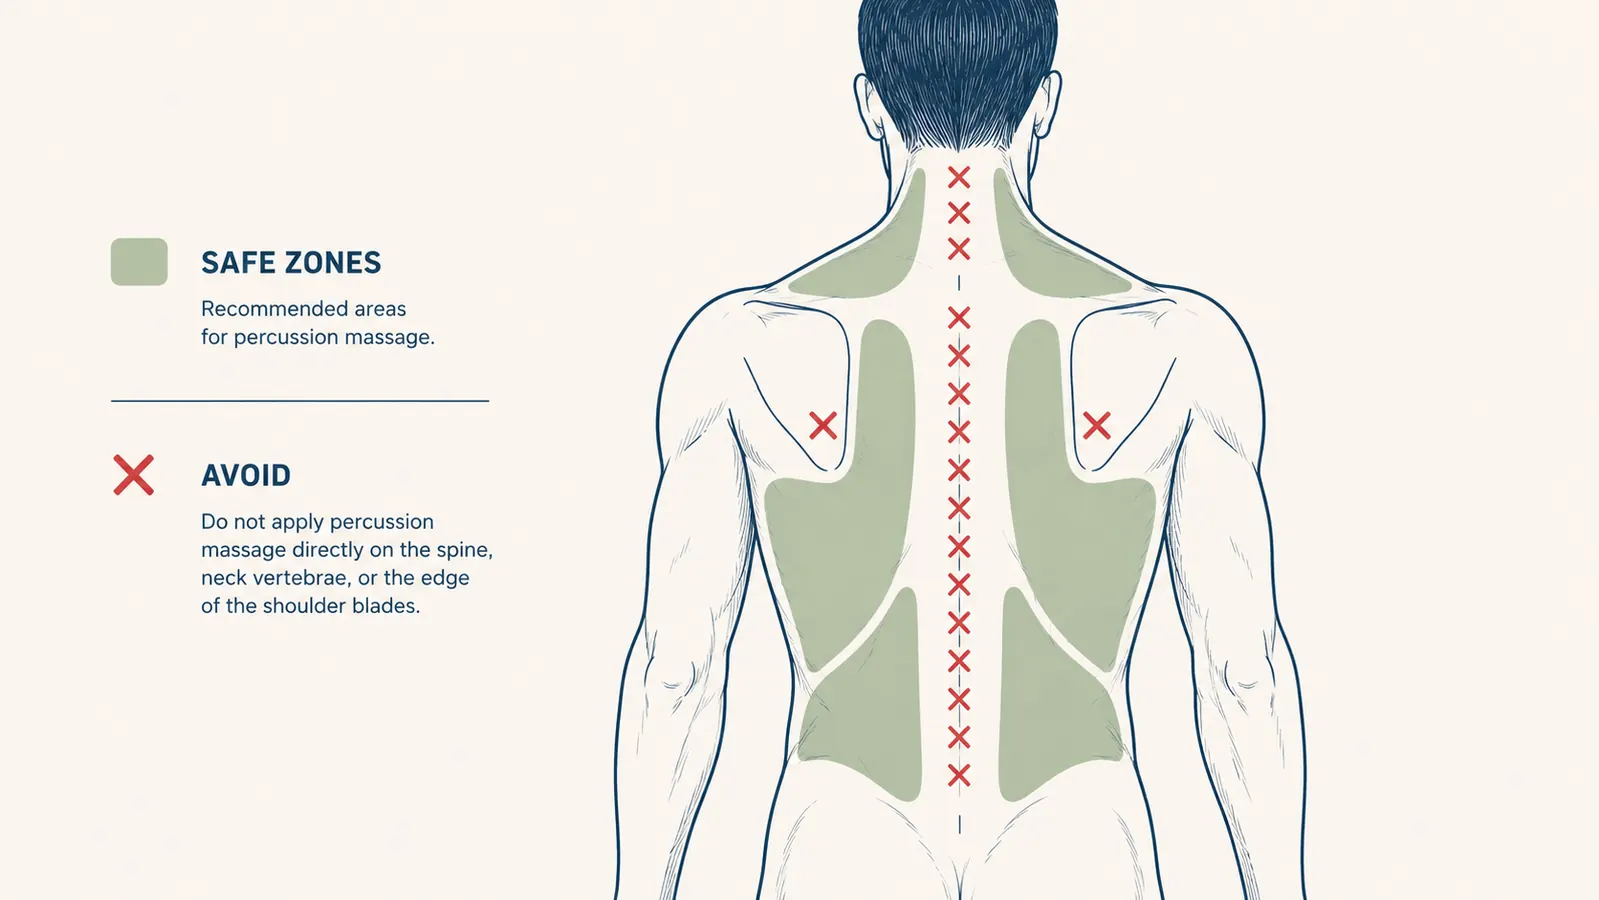
I spent three weeks running my massage gun directly over my spine. Not the muscles beside it. The spine itself. I thought I was helping my lower back. I was not. What I was doing was vibrating bone and irritating the surrounding ligaments, which is exactly the opposite of the problem I was trying to fix. The back spasms I kept waking up with were not from lifting heavy. They were from using a good tool badly.
The RENPHO Massage Gun has 4.6 stars across more than 30,000 reviews, and I believe it. The tool is solid. But no amount of good engineering saves you from bad technique. Most people who buy a massage gun for back or neck pain are missing three things: which zones to actually target, which attachment to use, and how long to stay in one spot before moving on. This guide covers all three. If you follow these steps, you will feel the difference in about 90 seconds.
Your back muscles are locked up right now. A percussion massage gun does in 90 seconds what stretching takes 20 minutes to attempt.
The RENPHO Massage Gun is the tool I use every single day for lower back tightness, trap knots, and the neck stiffness that builds up after hours at a steering wheel or a desk. 4.6 stars, 30,000+ reviews, and a price point that actually makes sense.
Amazon Check Today's Price on Amazon →Step 1: Identify the Muscles You Are Actually Targeting, Not the Bones
The spine is not your target. The erector spinae muscles that run on both sides of it are. For most lower back pain, those erectors are either in spasm, overly tight from hours of holding a posture, or just chronically underrecovered from physical work. Same story with the neck: the cervical vertebrae are off-limits; the levator scapulae, upper traps, and sternocleidomastoid on each side of the neck are the targets.
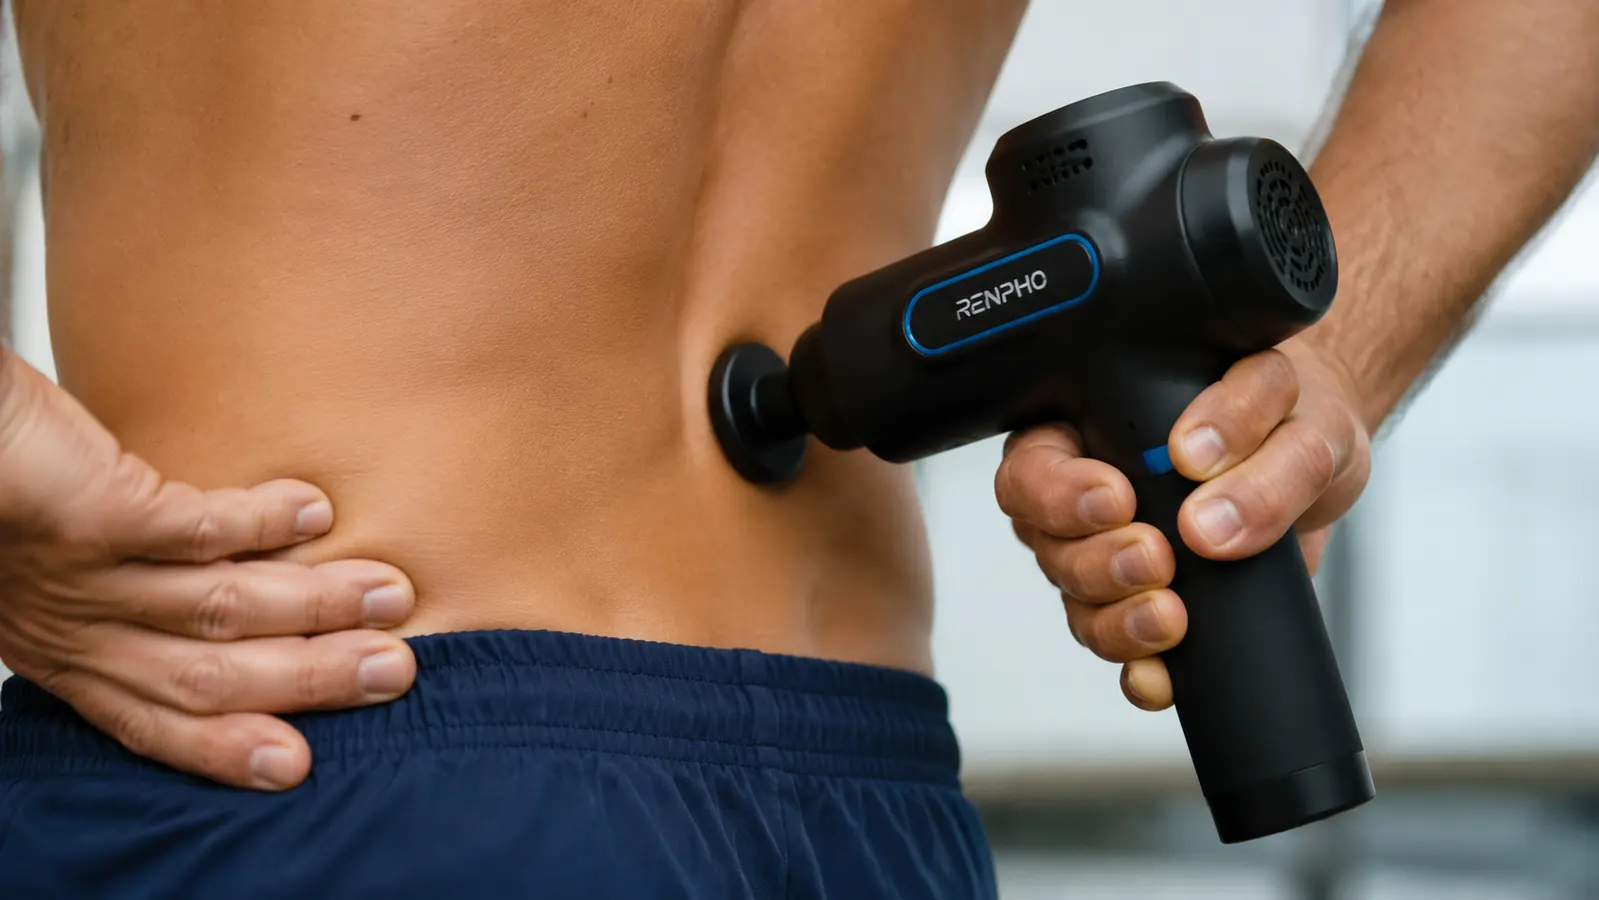
Before you turn the gun on, put two fingers beside your lower spine and feel where the muscles sit. That groove beside the bone, running roughly from your hip to your mid-back, is where the RENPHO head goes. For the neck, trace from behind your ear down to your shoulder and find the ropey band of muscle along the way. That is where you want pressure. Never directly on the bony spine, never on the back of the skull, never on the throat side of the neck.
The RENPHO ships with five attachment heads. For this purpose, you want either the large round ball head (for the lower back erectors) or the flat disc head (for the upper traps and neck). The fork attachment is designed for the spine area, but I personally skip it for the neck because the gap spacing is not quite right for most people. Ball head and flat disc, used in the right zones, cover 90% of what you need.
Step 2: Set the Speed Before You Press In, Not After
The RENPHO runs five speed levels from 1200 to 3200 RPM. The mistake most people make is pressing the gun firmly against their body and then cranking the speed up. At that point the vibration jumps hard enough to cause a reflexive muscle contraction, which defeats the whole point. Start at speed 2 or speed 3 before you touch the gun to your skin, then press in slowly.
For lower back work, I usually stay at speed 3 for the first 60 seconds, which is enough to get blood moving into the muscle belly without triggering a guard response. If the area is acutely sore or the pain showed up in the last 24 hours, drop to speed 2. If you are doing maintenance work on an area that feels tight but not painful, speed 4 is fine. Speed 5 is for large muscle groups like quads or glutes. I have never needed speed 5 anywhere near my spine or neck.
The RENPHO's motor stays noticeably quiet at speeds 2 and 3, which matters if you are using this at a desk or in a shared space. I have used it at my kitchen table while my wife was on a call in the next room and she did not notice. That kind of noise control is underrated and one of the actual reasons this gun has held up as my daily driver for months.
Step 3: Use Slow, Deliberate Passes, Not Circular Scrubbing
Move the gun in slow, straight passes along the muscle grain. For the lower back erectors, that means dragging the gun from the top of your hip straight up to the mid-back, taking about five to seven seconds per pass. Do not scrub in circles. Do not hover in one spot for more than 15 seconds. The percussion mechanism is doing the work depth-wise; your job is to cover the length of the muscle.
When you hit a knot, which you will feel as a spot where the gun's vibration suddenly feels different and more intense, slow down but keep moving. Stay on that spot for no more than 10 to 12 seconds, then keep moving up or down the muscle. Coming back to it two or three times in a session is fine. Parking on a knot for 45 seconds straight is not. It overstimulates the area and you can feel a dull bruised sensation the next day.
Step 4: Do the Neck Last, With the Gun Angled, Never Perpendicular
I do the lower back first, then the mid-back and upper traps, and the neck is always last. By the time you get to the neck, the surrounding musculature is already warmed up and more responsive, so you need less pressure to get the same effect. This matters because the neck has structures you need to respect: the carotid artery runs along the front and side, and even percussion that feels mild on a thick back muscle can feel intense and disorienting on the neck.
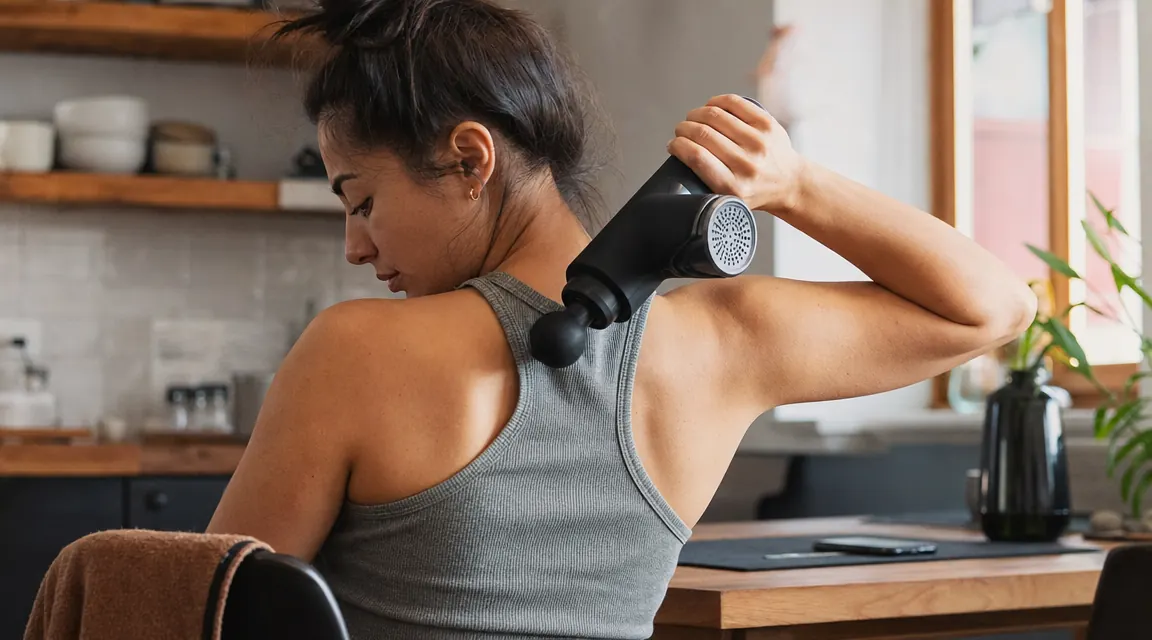
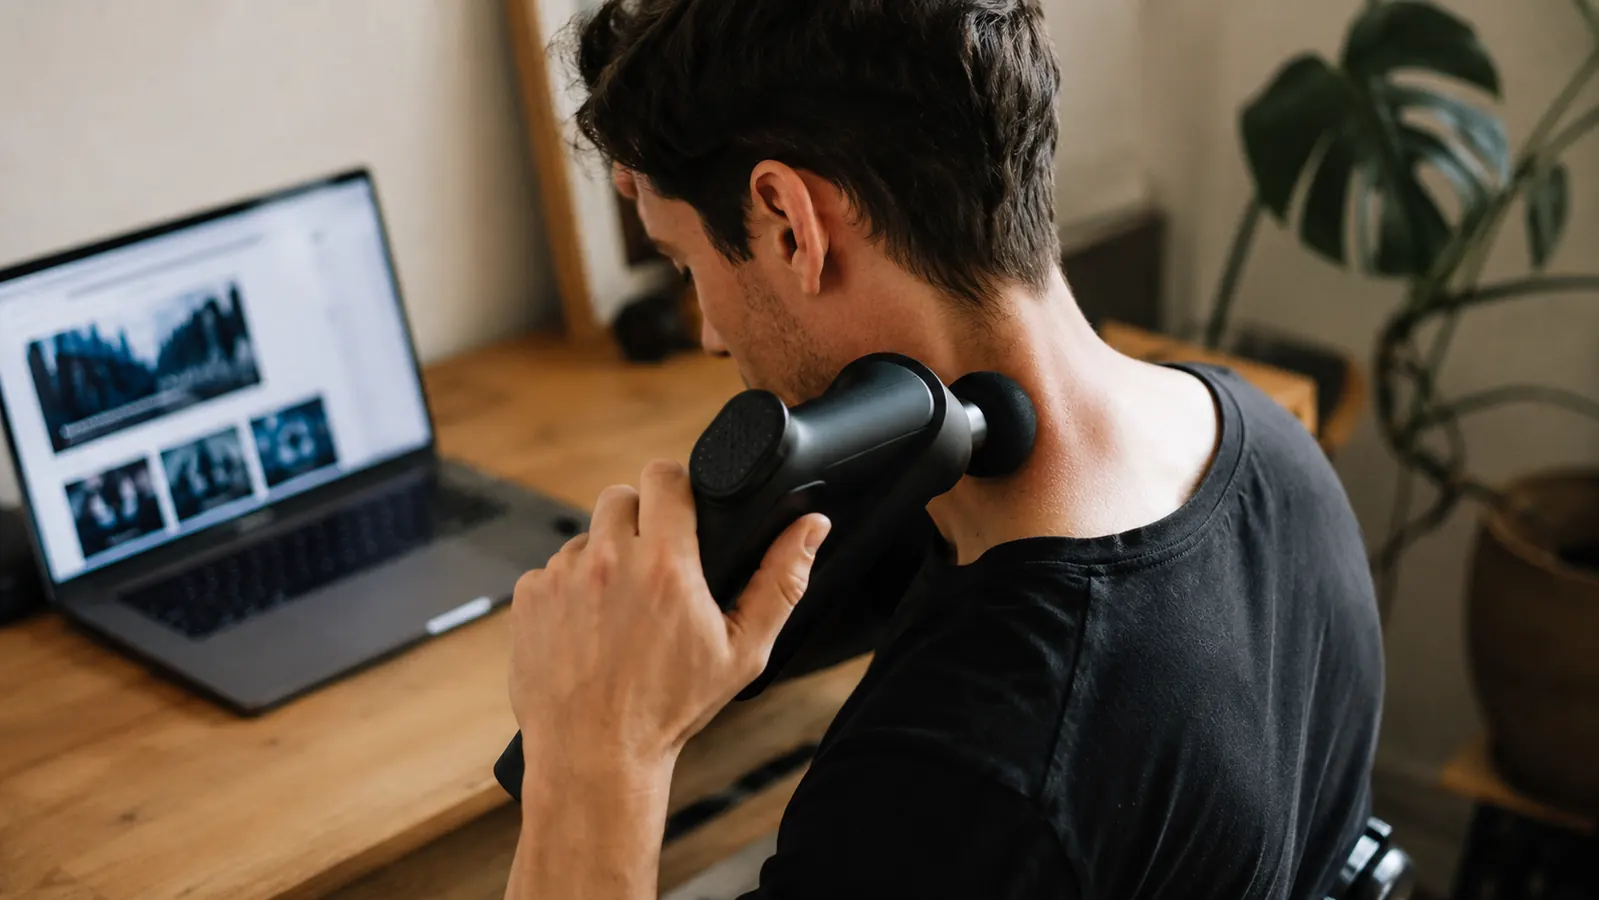
For the neck, angle the gun at about 45 degrees instead of pressing in straight and perpendicular. You want glancing contact with the muscle, not direct plunging pressure. Use the flat disc head, drop to speed 2, and work only the back and sides of the neck. The strip of muscle from the base of your skull down to your shoulder, just behind your ear line, is the zone. Do not go anywhere near the front of your neck. Thirty to 45 seconds per side is enough. The neck responds fast.
One practical tip: use a mirror or do it in a doorframe so your arm does not fatigue mid-session. The RENPHO weighs about 2.3 pounds, which sounds light until you are holding your arm up at a weird angle for two minutes. A corner of the room where you can brace your elbow against the wall makes this much easier, especially for the right side of your neck if you are right-handed.
The difference between a massage gun helping your back pain and making it worse comes down to where the head is. Two inches off center, on muscle instead of bone, and the whole experience changes.
Step 5: Time the Sessions to When Your Body Actually Needs It
I get asked a lot whether to use the massage gun before or after activity. The answer depends on what you are trying to do. For lower back stiffness from sleeping, using it in the morning for 3 to 5 minutes before you start moving is genuinely helpful. It increases blood flow to muscles that have been static all night and can cut down that first-hour groaning phase significantly. Keep the speed low (2 or 3) and keep it brief.
After a long shift on your feet, after a drive, or after a workout, is when you can go a little deeper and use it more aggressively. Post-activity is where the RENPHO earns its keep for me. I do a 5 to 7 minute session hitting both sides of the lower back, the upper traps, and then the neck, and the tension I carry from a full day of sitting or lifting drops noticeably within about 20 minutes. My sleep quality in the first month I tracked this improved by a measurable amount. Not supplement-level improvement, but I was waking up stiff less often.
Do not use the gun on an area that is acutely injured, swollen, bruised, or inflamed within the last 48 hours. Percussion massage on fresh tissue damage makes things worse. If your back pain came from a specific incident this week, ice it first. The massage gun is for chronic tightness, accumulated tension, and post-activity recovery. It is not an acute injury treatment tool.
What Else Helps Alongside the Massage Gun
The RENPHO works best when it is part of a short recovery routine, not a standalone fix. After a session, follow up with two or three minutes of basic mobility work on the same areas. For the lower back, that means a supported cat-cow or a slow hip flexor stretch, because tight hip flexors pull the lower back into extension and keep the erectors in a constant low-grade fight. Loosening the muscles first with the gun and then stretching the shortened structures is a combination that actually compounds over time.
For the neck, a simple chin tuck (driving your chin straight back, creating a double chin) held for 10 seconds done 5 times after the gun session helps reset the forward-head position that most desk workers and drivers develop. The gun softens the tight tissue; the tuck starts retraining the position. Neither one alone gets you as far as both together.
If you want a deeper dive into how the RENPHO performs across multiple use cases and training schedules, including the four situations where it is not the right tool, the full long-term review covers all of it. And if you want specific reasons why percussion massage outperforms static stretching for post-workout soreness in the first 48 hours, the breakdown of the RENPHO's top benefits is worth reading before you commit to a session schedule.
If your back is going to keep getting beaten up, you need a daily tool, not a weekly foam roll. The RENPHO is the one I reach for first, every time.
4.6 stars, over 30,000 reviews, five interchangeable heads, and a battery that lasts long enough for a full-body session without stopping to recharge. Check the current Amazon price below.
Amazon Check Today's Price on Amazon →